These Dollar Tree Ghosts are the cutest, easiest, and cheapest DIYs you will ever see.
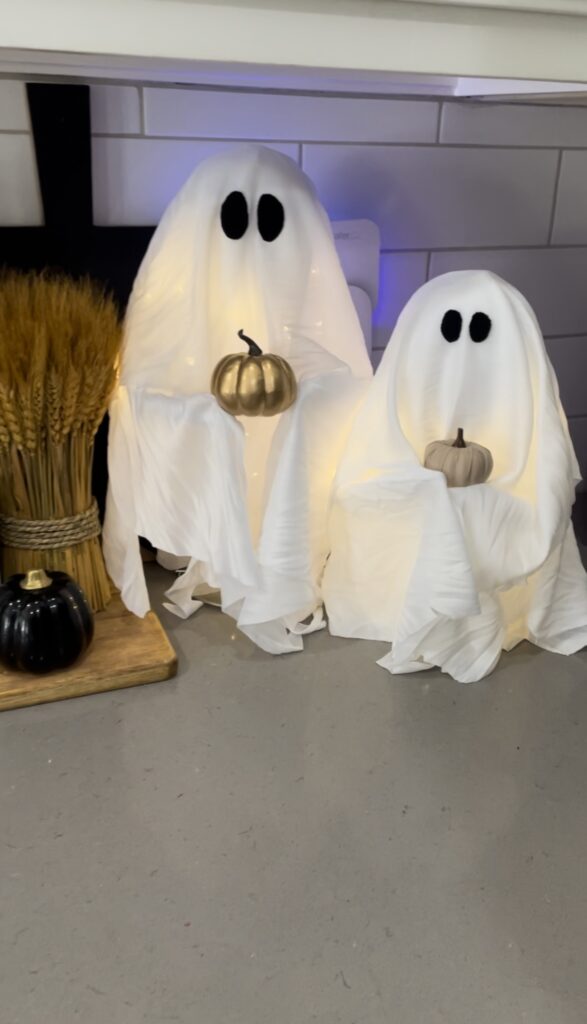
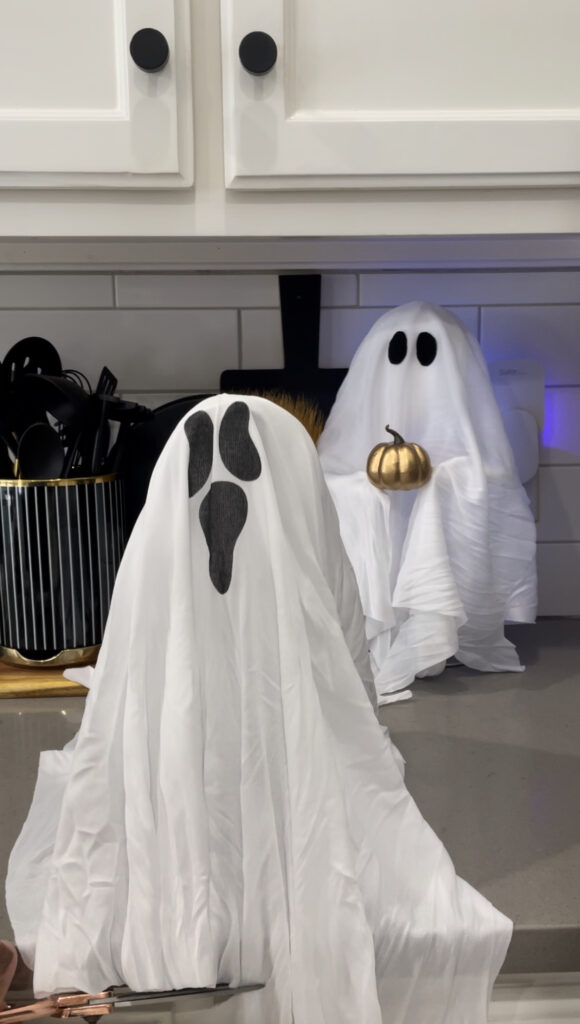
Would you believe me if I told you both of those little ghosts cost me about $5 bucks? Making these Dollar Tree DIY ghosts also only took about 20 mins to make. I still can’t believe these cute additions to our kitchen were so inexpensive.
This post contains affiliate links, which means I receive a commission if you make a purchase using the links below. All opinions are all my own.
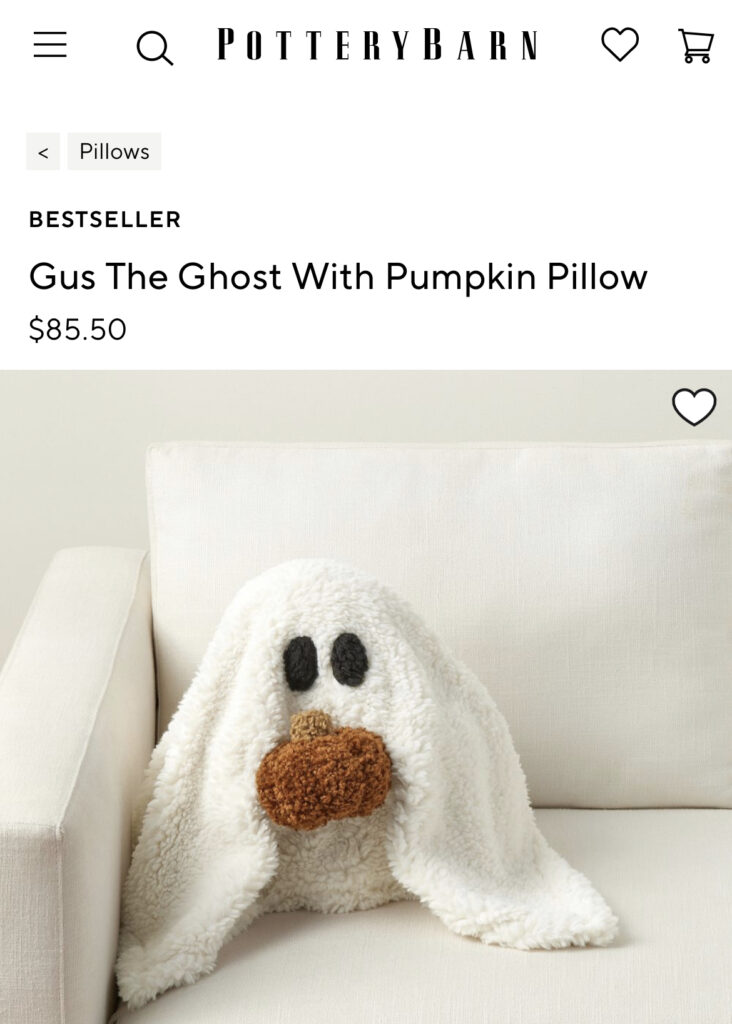
This was my inspiration! I’d like to think I have Pottery Barn taste on a Target, or maybe Dollar Tree, budget. LOL. Especially when it comes to seasonal decor. Halloween Decor might just be my favorite. I love Christmas but there is just something so fun about Halloween decorations. This little pillow from Pottery Barn is just the cutest but I couldn’t justify getting him for the price. This is where I put my DIY hat on and try to find a good alternative on the cheap.
My inspiration spark started at Dollar Tree of all places. I knew I would find something there that would work for this project. Now that they carry items that are also $5 their seasonal offering double. I wanted the Pottery Barn ghost “look” but I wanted a countertop version and not a pillow because let’s be honest I would just get mad if it ended up on the floor.

These hanging ghosts stopped my in my tracks. I wanted white fabric for ghosts and this was literally a ghost but a little too creepy for my taste. I got them anyway along with my stands.
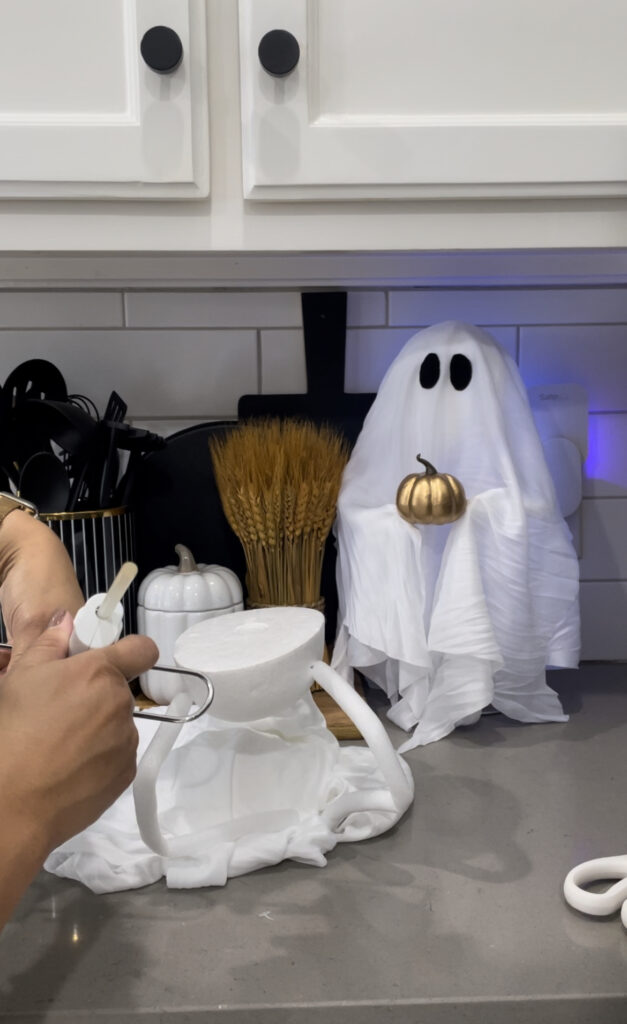
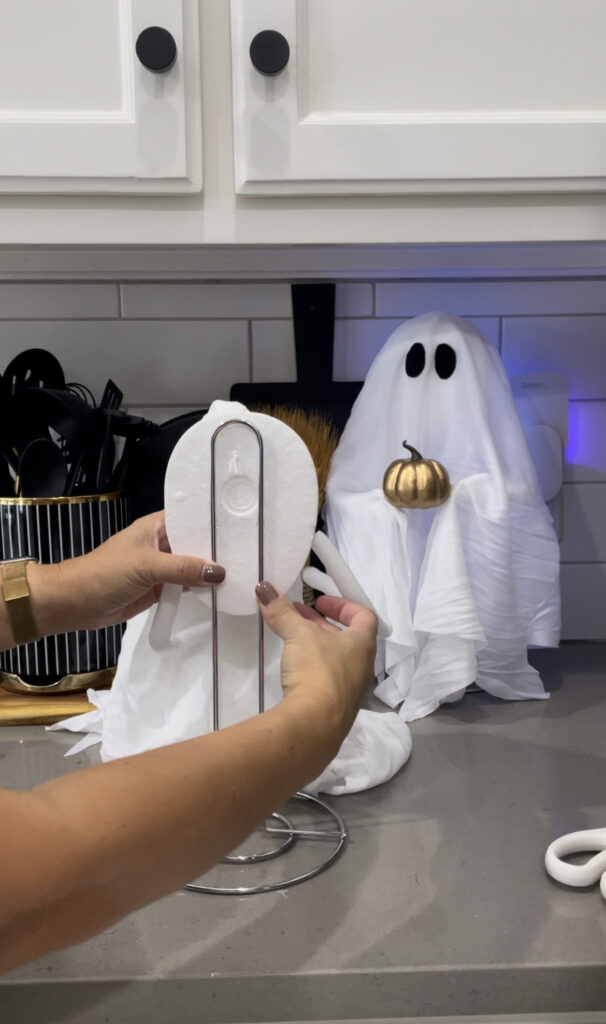
Paper Towel holders, yes, those are my stands for these cute ghosts. They are the perfect height and are very sturdy because of the wide base.
I am sharing my Instagram reel of the steps HERE. The voiceover took me longer to do than the project did. Yes, it is that easy!!
Supplies Needed
- Dollar Tree hanging ghost
- Dollar Tree paper towel holder
- Hot Glue gun – or zip ties
- Scissors – I hide this pair because it’s my favorite and it cuts fabric so well
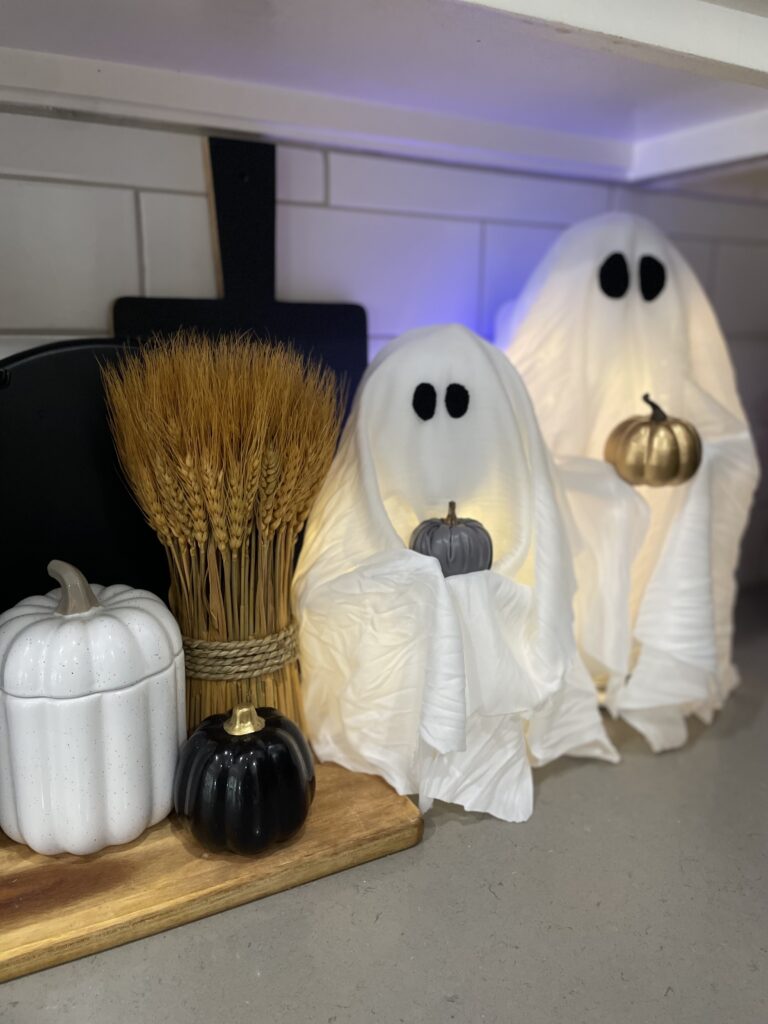
- Twinkle lights – I am not including these lights in my price. I purchased them last Christmas and I am reusing them. Any small light set will do the trick.
- Black fabric, I used an outgrown dress sock. Felt would work great too.
- small pumpkin – or any small item the ghost can hold
Start by cutting the ghost from the package. Don’t try to pull the packaging off you might end up ripping the fabric. Once the ghost is free, glue it or tie it to the paper towel holder.
Once the ghost is in place you can cut the extra fabric to use later. The spooky face will go in the back the the extra fabric will cover it up 😉
The little ghost is already starting to take shape. Did I mention that these ghosts have hands! They are spread out in the packaging but we can bend them forward to make them hold an item. Next up, the lights!! Not necessary but they are so fun. The battery wire lights I used went around both ghosts. These light can be used later for Christmas. I made a mini village in a cake stand.
Once the lights are wired around you can play around the the fabric. Add the piece you cut off from earlier and place it over to hide the arms and creepy face. Adjust the arms so that it can hold something. We will get to that in a bit.
The eyes are next. I used a sock. It was my daughter black dress sock. I cut small ovals instead of circles. Fold the material you are using over so you only have to cut once and the oval shapes you cut out will be identical and glue in place.
Lastly, my favorite part. Adding the sweet little pumpkin. I don’t even remeber where I got the gold one. I have quite the collection of small pumpkins. Get creative and use what you have on hand. Any small item will do!
This will definitely be the easiet and cutest DIY for Halloween that you will ever do! I am loving these two so much. However I might pull out the steamer now that I look at the picture. LOL
Hope you love them as much as I do. Let me know if you try making them.
Happy Halloween 🖤 Luci


Super cute!
I plan to try this when Halloween gets a little closer.
Thank you for the idea!
Did I miss how you made one shorter than the other? Is one just up on a stand? They are darling and I can’t wait to get to a dollar tree when we get home from camping! Thanks for sharing.
I was wondering the same thing about the size difference. Too bad she didn’t reply
Hi Deb, Glueing the ghosts more towards the top or bottom helps them vary in height 🙂
Hi Amy, Thanks for the question. I was able to make the different heights by glueing the ghosts to the stands at different places. I made the taller ghost my glueing the bottom of the ghost to the top of the paper towel stand. The shorter ghost was glued at the top.
Hope that helps 🙂
These were so cute I had to try making them! Super easy.
Revamping the dollar tree ghost is such a smart idea! I just had my carpet cleaning done so now I’m all ready to break out the halloween decor. Can’t wait to add this to my arsenal!
So creative, just went to Dollar Tree today and bought the supplies! Excited to make them soon!