Painting our corner fireplace black was one of the best ideas I had. Ask my husband he will tell you I come up with so many. LOL. Our plan was to retile and change out the surround at some point but when you live in a fixer-upper that list gets very long and you must prioritize and do incremental updates. From drab to glam with a black painted fireplace.
This post contains affiliate links, which means I receive a commission if you make a purchase using the links below. All opinions are my own.
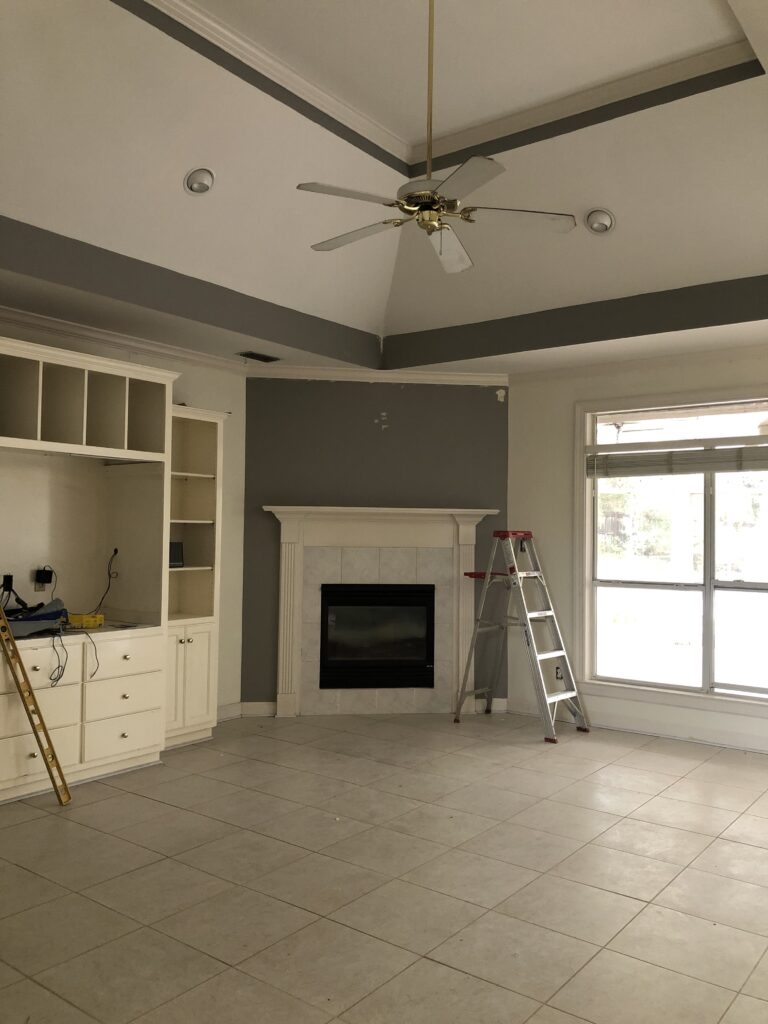
The before
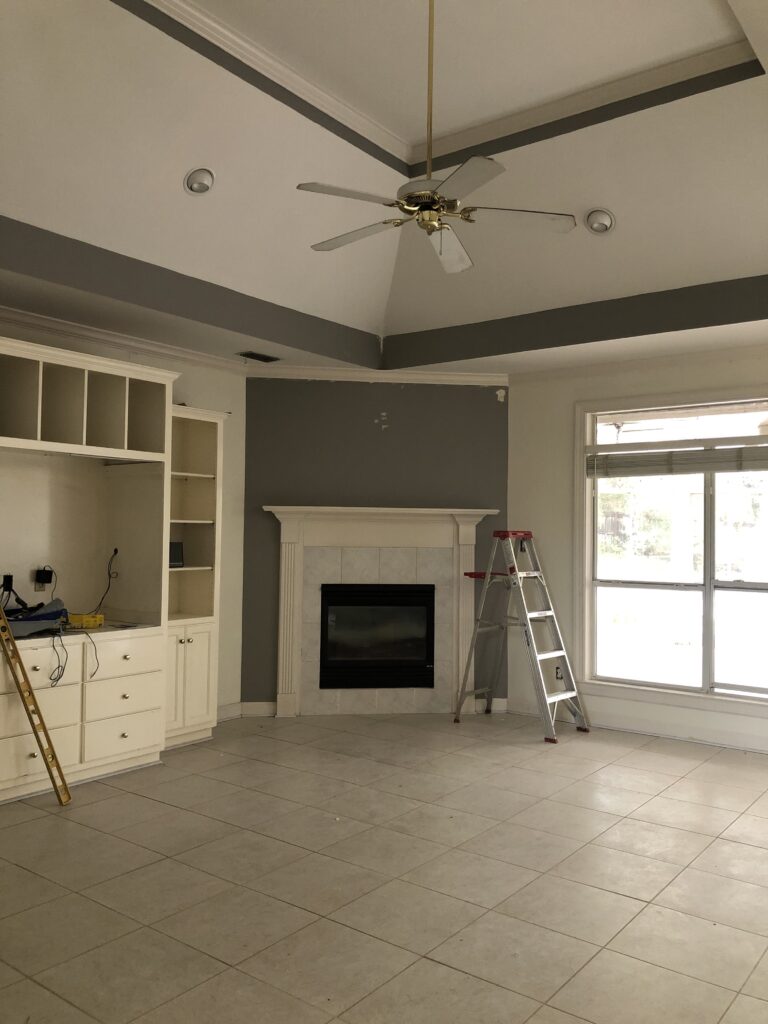
Before I share the reveal, I need to step back and show you what this fireplace looked like when we moved in three years ago. Not horrible but it stands out significantly and not in a good way. Little did I know then that it would go through 3 updates.
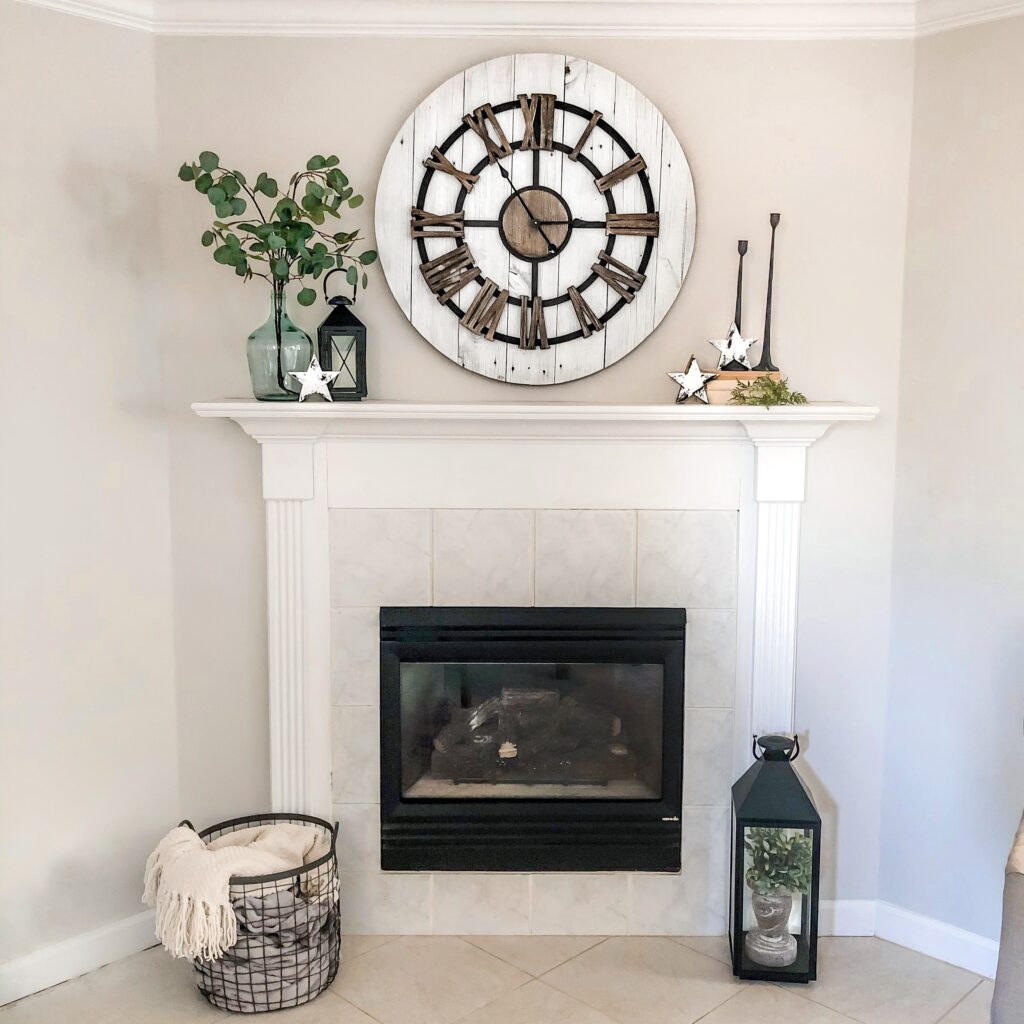
update #1
The first update was painting the top half of the fireplace the same color as the walls and cleaning the inside glass of the gas fireplace. It definitely lighted up the space and made it brighter. It remained like this for a few months while we tackled other projects around the house.
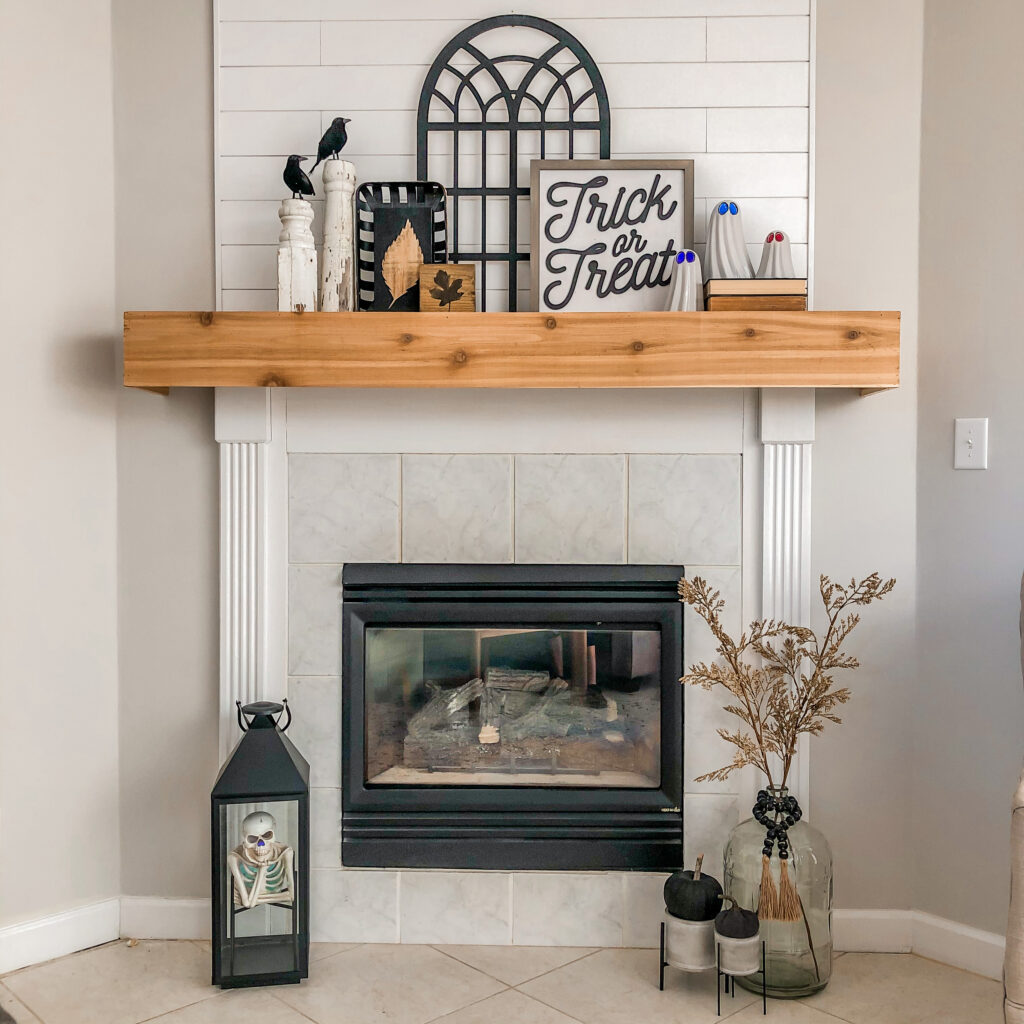
Update #2
The second update was a little more significant. We added leftover shiplap what we had from a different project and added a wood mantel cover to go over the exsisting one. Just realized that I like to do fireplace projects around Halloween. This update was much more our style and it lasted for two years without doing much except decorating for the seasons and holidays but I knew that fluted molding would eventually get to me. It just didn’t fit with the shiplap top.
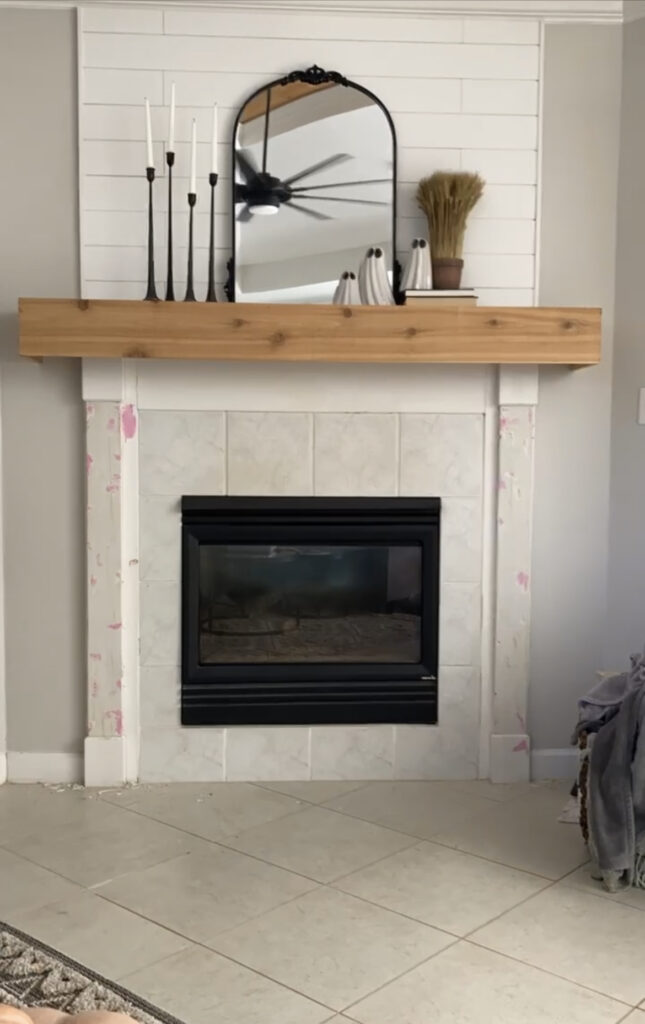
Update #3
The fluted molding really got to me one afternoon and I asked my handy hubby what it would take to just rip off the molding and replace it so I can just paint the fireplace. He said that it “should” come off fairly easily, and that we could replace the molding with a more simple piece of wood. That was all I needed to jump in and do it, but he gladly stepped in. Looking back I am glad he had a day off and that he jumped in to help me because this project happened in one afternoon. He took a small crowbar and got in between the fireplace and the fluted molding and just ripped it out. Lo and behold the back of the fluted molding was simple so all we had to do was flip the molding around and fix the nail holes. Yay!!
the process and Supplies
The next part was the prep for the paint. We used some spackle and a putty knife to fill the nail holes and scratches. The putty will turn white and that’s when you know it is dry enough to sand. We sanded the entire area with a handheld sanding pad and mouse sander. After we cleaned up the dust and debris we used blue tape to mask around the fireplace. As I mentioned earlier this is our temporary solution until we retile this fireplace. I didn’t want to spend too much money on paint knowing there was a teeny tiny chance that it wouldn’t turn out well in black and that I would paint it white. I wanted a true black so we went with a basic nondesigner color. Looking back we should have used a primer, especially for the tile. If your fireplace is in a high-traffic area or if you have a hearth absolutely use a primer. Since we don’t have furniture near that area I wasn’t concerned with scratches.
A quart of black paint and an hour later I was smitten. We worked together to get this project completed before we had to get the kids from school. This is also when I noticed I should really clean the glass in the fireplace. You can’t even see the faux logs in there. LOL
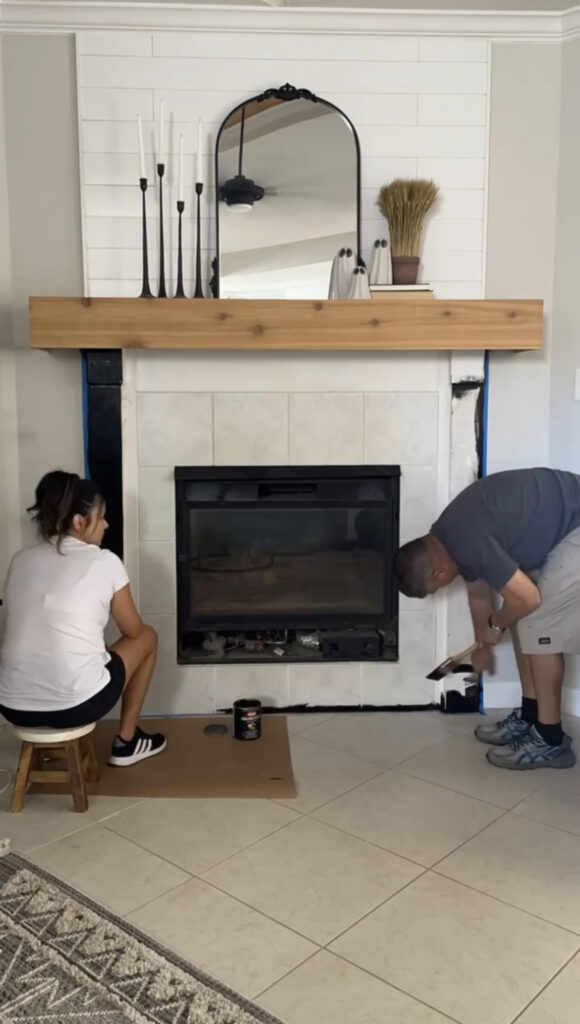
It took a total of 3 coats to paint the bottom surround of the fireplace black. The paint we used dried very quickly and we were able to apply a second and third coat within an hour. It has completely transformed the look of our living room. It looks updated and modern and more importantly it feels so warm and cozy. I am so excieted to see it how it looks for all the seasons.
The before one more time
The After
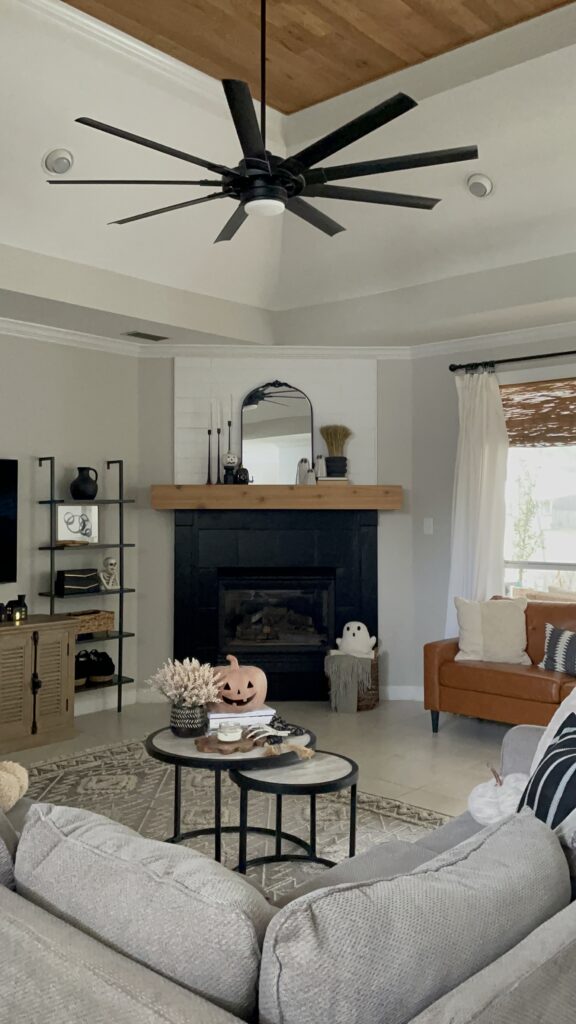
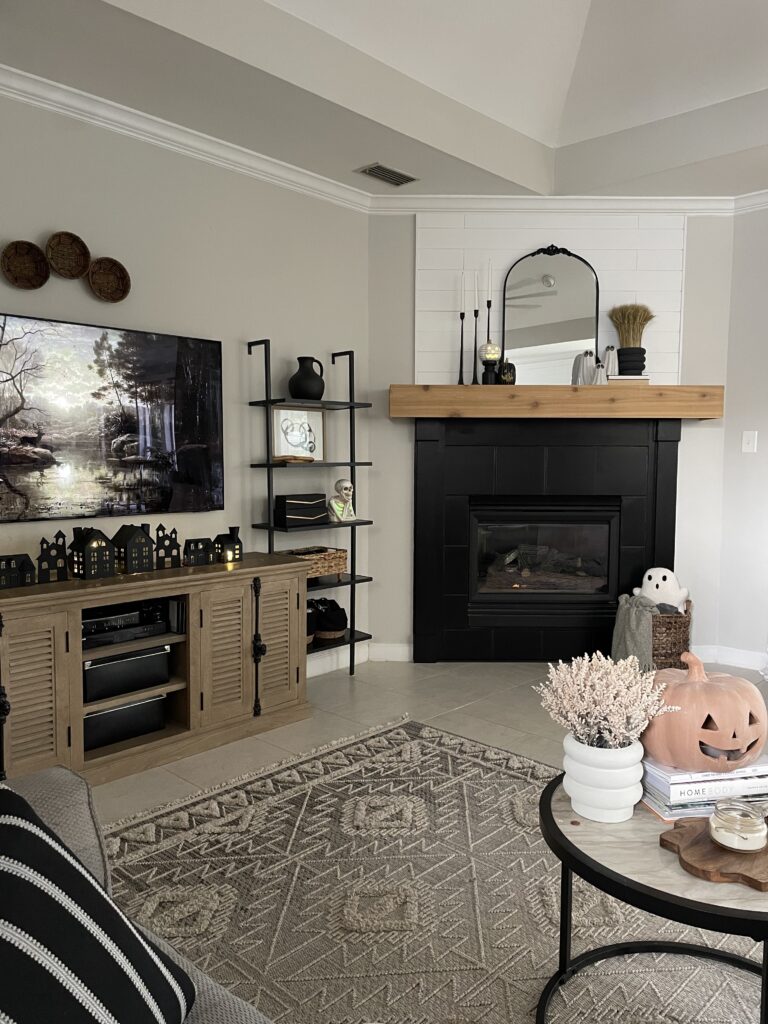
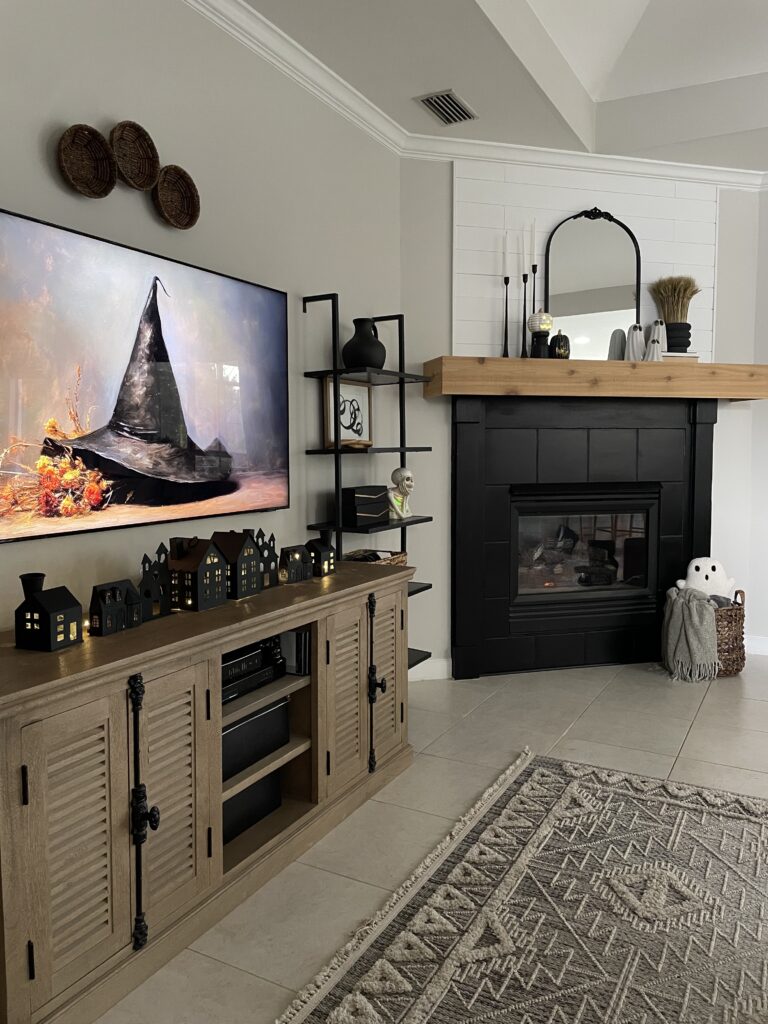
I shared my mini haunted houses earlier this month but that fireplace steals the show 😍
Sharing more details and frequently asked questions about this spacce.
- TV art is from YouTube. Search Halloween TV art and find one that suits your style.
- TV console was a Marketplace find. It was from Home Depot and is no longer in stock 🙁
- The rug is from Boutique Rugs. 8×10 Agoo
- The bookshelves are from Amazon
Hope this has inspired you to paint!
❤️Luci


Leave a Reply