Join me as we create a DIY gingerbread village without breaking the bank. The magic of the holiday season is about to unfold, and Dollar Tree is here to be your go-to haven for budget-friendly crafting.
This post contains affiliate links, which means I receive a commission if you make a purchase using the links below. All opinions are my own.
This little village was inspired by the viral Pottery Barn gingerbread village pieces. They are so popular and are selling out very quickly. I absolutely love them but not the price tag. And to be honest I don’t have the space for sizes of the Pottery Barn pieces.
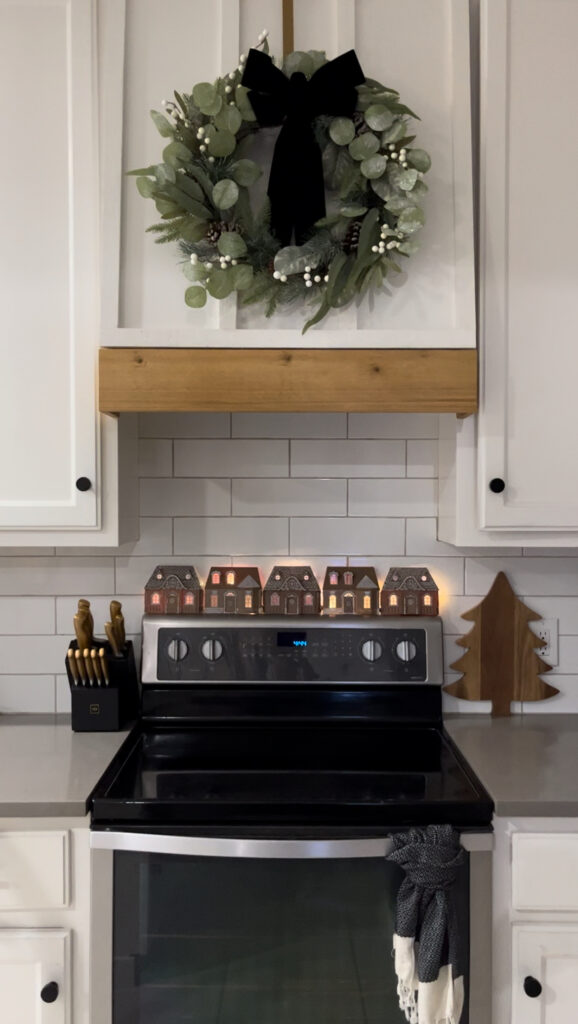
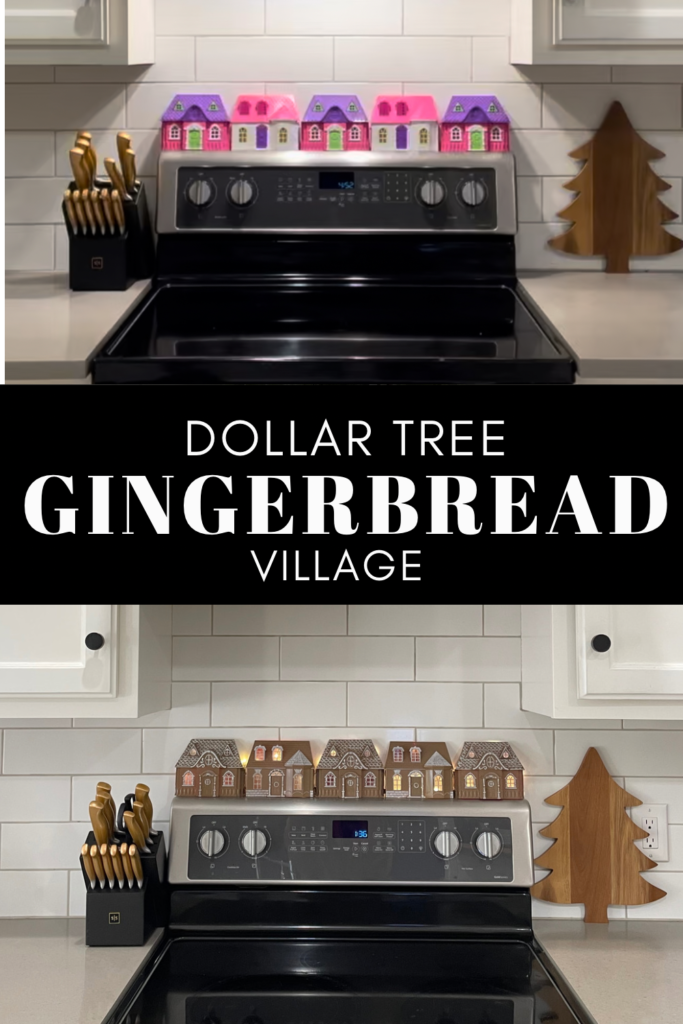
The space in between the hood and the range is always difficult to decorate. I always want to add something festive to this blank space, especially for the holidays. There is a gingerbread theme going on in the kitchen and that’s when the spark occurred. Tiny gingerbread houses along the top of the range would be so cute!! I made a haunted house village for Halloween a few months ago. Those houses I got from Dollar Tree would be perfect for this idea! And if they didn’t work I would only be out a few bucks.
Why Dollar Tree is Your Holiday Haven
Dollar Tree isn’t just a store; it’s a treasure trove of possibilities. This budget-friendly haven is the ultimate destination for turning your gingerbread dreams into reality. They have expanded and don’t just carry dollar items. There is now a $5 section too. I love this store for its seasonal decor.
Supplies needed
- toy playhouses or small mini ceramic houses
- Nutmeg Spray Paint
- White Paint Pen
- Battery-operated fairy lights – optional
- tape – optional
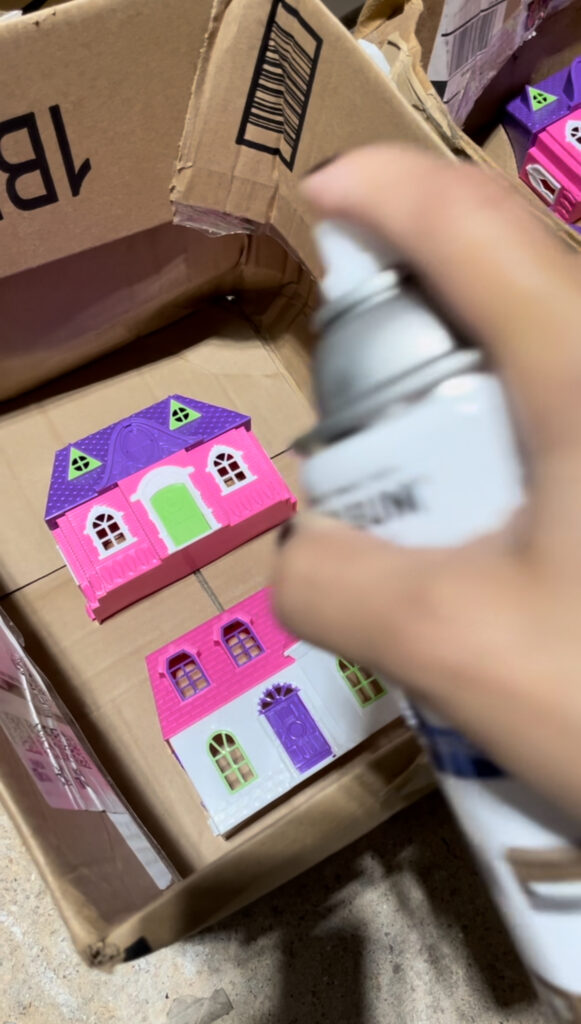
For this project, you will head to the Dollar Tree toy section and pick up doll playhouses. Small ceramic houses would work for this project as well. The store I went to carried two different styles.
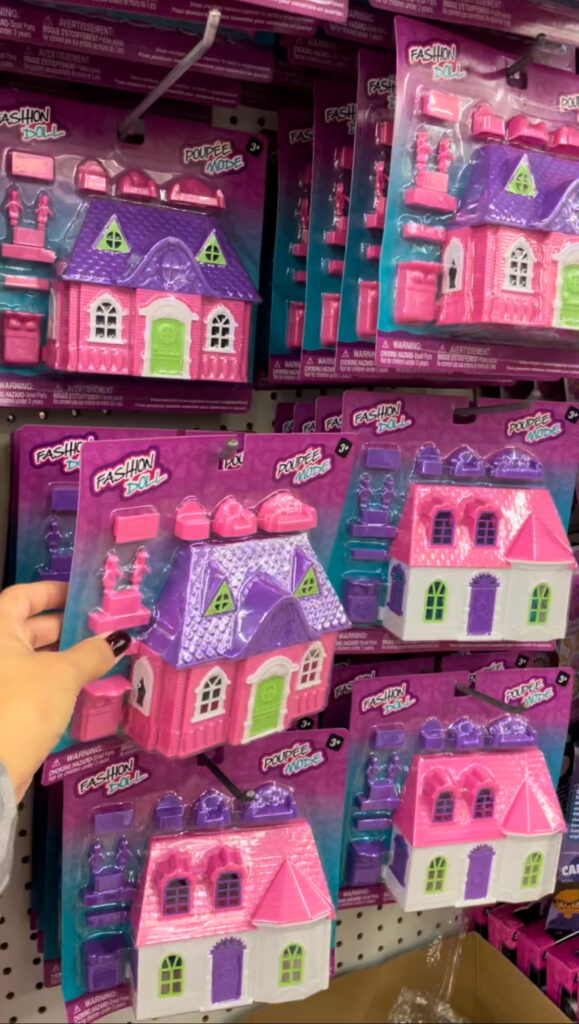
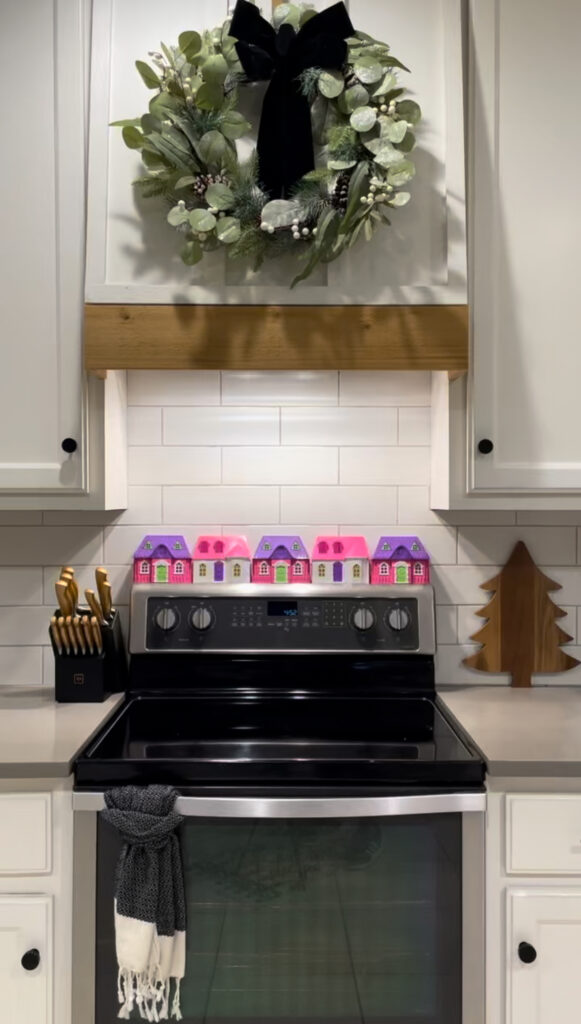
Don’t they look cute up there? Most ranges are 30 inches wide so I needed 5 of the toy houses. If you are creating this project on a shelf or mantle measure the total length. Depending on the length needed the amount of toy houses will vary. Each toy house measures 6 inches in width.
Solid Start: Choosing the Right gingerbread color
Your gingerbread house’s color exterior is crucial. I did some research and discovered that Rustoleum Nutmeg was a beautiful gingerbread shade. I mean the name is one of the gingerbread ingredients. LOL. Feel free to paint instead of spray paint. I am sure there is a nutmeg acrylic paint you could also use for this project.
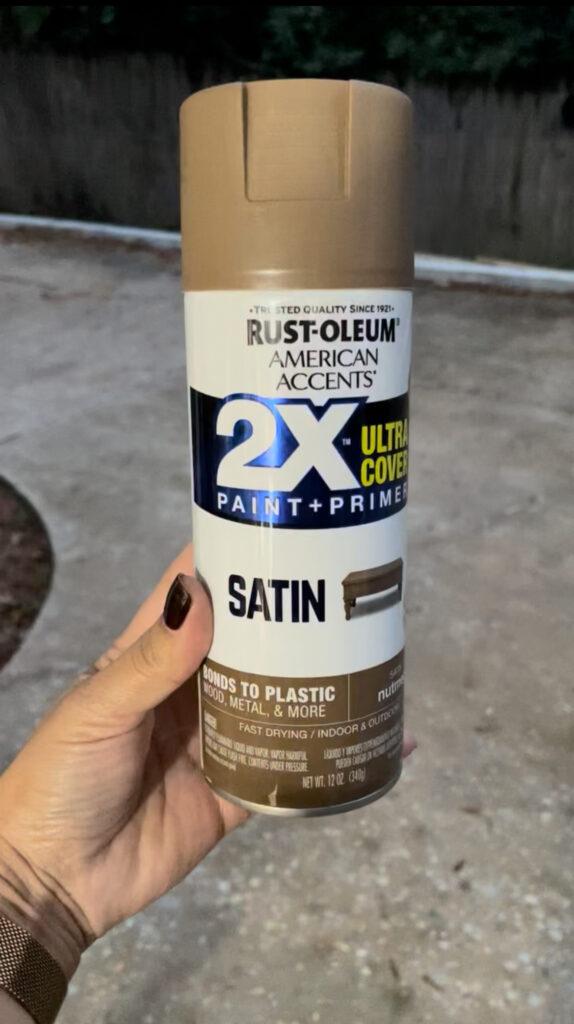
Grab some empty boxes and place the toy houses inside. This will catch a lot of the over-spray. To get the best coverage apply light coats and let them dry before reapplying more paint. Spay the fronts and then the sides and don’t worry about the back. No one will see the back if you place them against the wall. Let them dry overnight before you jump to the next step.
Frosting Fun – the Icing on the house
Achieve icing perfection without the stress. This is the part that I knew would either break or make the project. I use paint pens to write on my ornaments. Been doing these ornaments for years and my favorite paint pen is the broad line craftsmart pen. I had black but I had to run to Michaels to get a white paint pen.
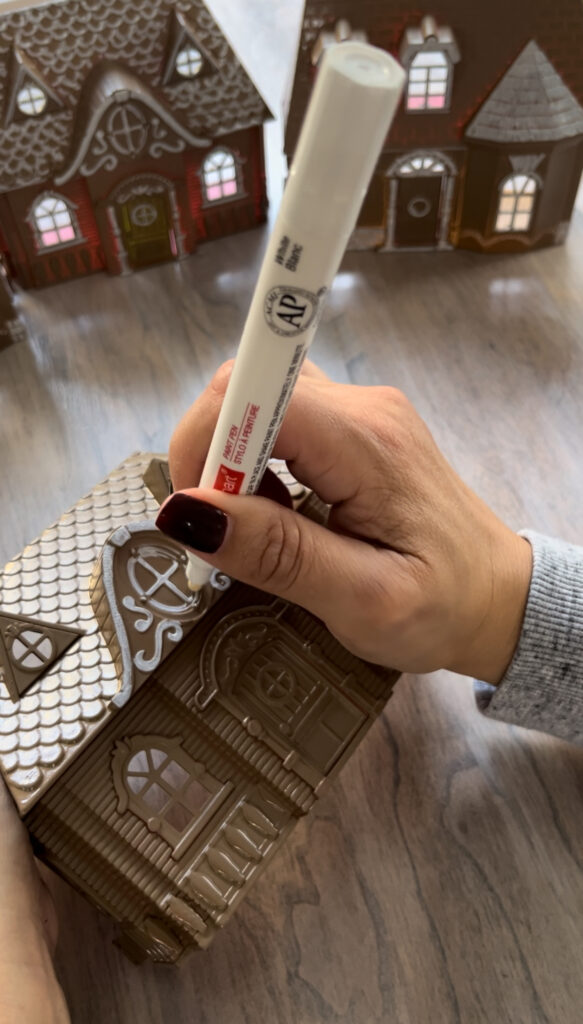
The best part about these toy playhouses is that they have the best texture exterior. It made painting on the icing really easy. Simply go over the decorative areas with the paint pen. Paint around the door, can you believe it opens, and the windows. Get creative and paint as much or as little as you want. Remember it doesn’t have to be perfect. Icing is never perfect and that’s what makes things homemade.
The magic Twinkle lights
This next step is completely optional but boy does it elevate this DIY gingerbread village. I have 2 sets of these battery-operated fairy lights. A total of 4 strands that I have twinkling around the house. What can I say I am addicted to Twinkle! They come with a remote, 8 modes and they have timers too. Line up your gingerbread houses where you want them. Starting on one end tape the battery pack and some of the wire with lights in the first house.
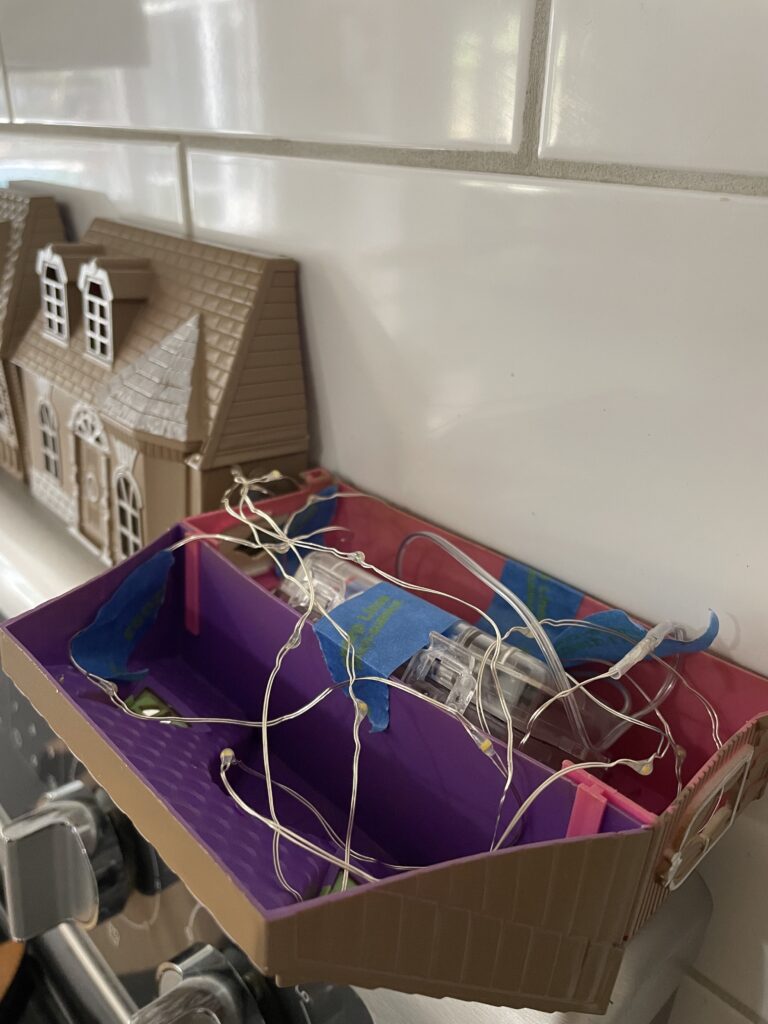
Not pretty but you can’t see the back of these houses so don’t worry about how they look. Continue to tape the lights inside the houses. Try and eyeball how much you will need per house. It doesn’t have to be perfect. I laid each house like this and tapped the lights down.
The Gingerbread Village result
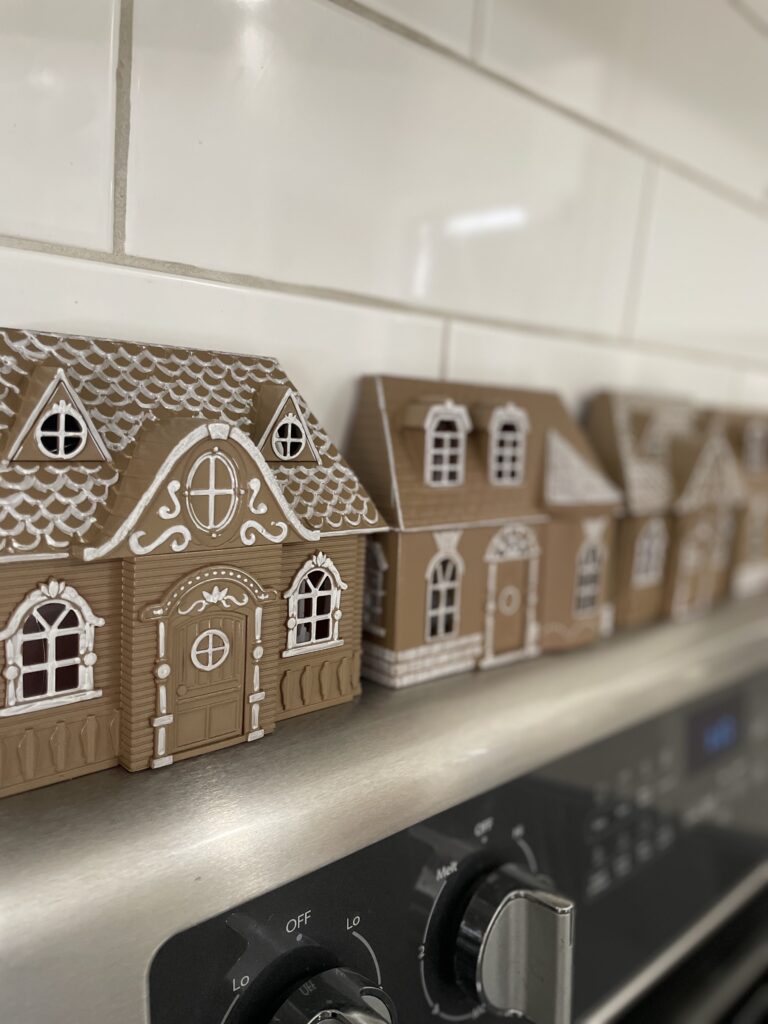
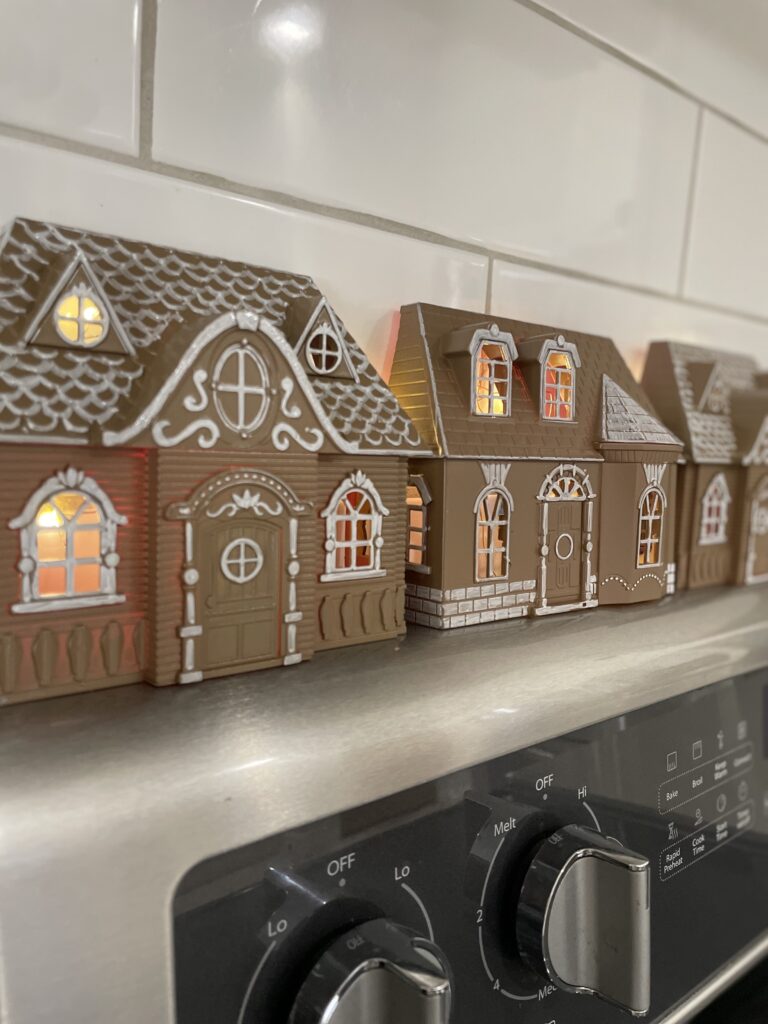
Tada!! I am so smitten with these gingerbread houses. The fairy lights really take this to another level. I am taking a moment to bask in the glory of what I’ve accomplished with Dollar Tree’s toy playhouses. This entire project would run you approximately $20 with all the supplies and lights. Not bad considering one small Pottery Barn house is tagged at $39.50. This inexpensive DIY gingerbread village was a dream come true.


Good day! I could have sworn I’ve been to this blog before but after looking at many of the articles I realized it’s new
to me. Anyways, I’m certainly pleased I stumbled upon it and I’ll be bookmarking it and checking back frequently!
Love the village! Great idea ❤️
I saw these last year on FB and searched for your post here and saved it. I’m so exited to be doing them this year. I just started paining the houses today. Thanks for the cute idea!