It’s the most wonderful and busiest time of the year. Right? If you are here you love to decorate as much as I do. I have been searching for a piece of art to put behind our family sectional. An affordable winter piece that I could leave up long after Christmas. I searched and It doesn’t exist. So what’s a girl to do? Create one! And let me say I am so glad I did! This DIY textured Winter art piece is dimensional, modern, and neutral. Let’s bring some of that chill from the outside indoors by creating textured winter art.
Winter Art Inspiration
My vision consisted of snow-covered skinny trees with muted tones and subtle hues. I was going to purchase a large canvas at the craft store but they can get really expensive plus I would still have to add a frame around it. When I was at Goodwill a few weeks ago I remembered seeing large outdated artwork frames. The size I needed had to be around 24×36 so off I went hunting for affordable framed artwork I could recycle and makeover.
This post contains affiliate links, which means I receive a commission if you make a purchase using the links below. All opinions are my own.
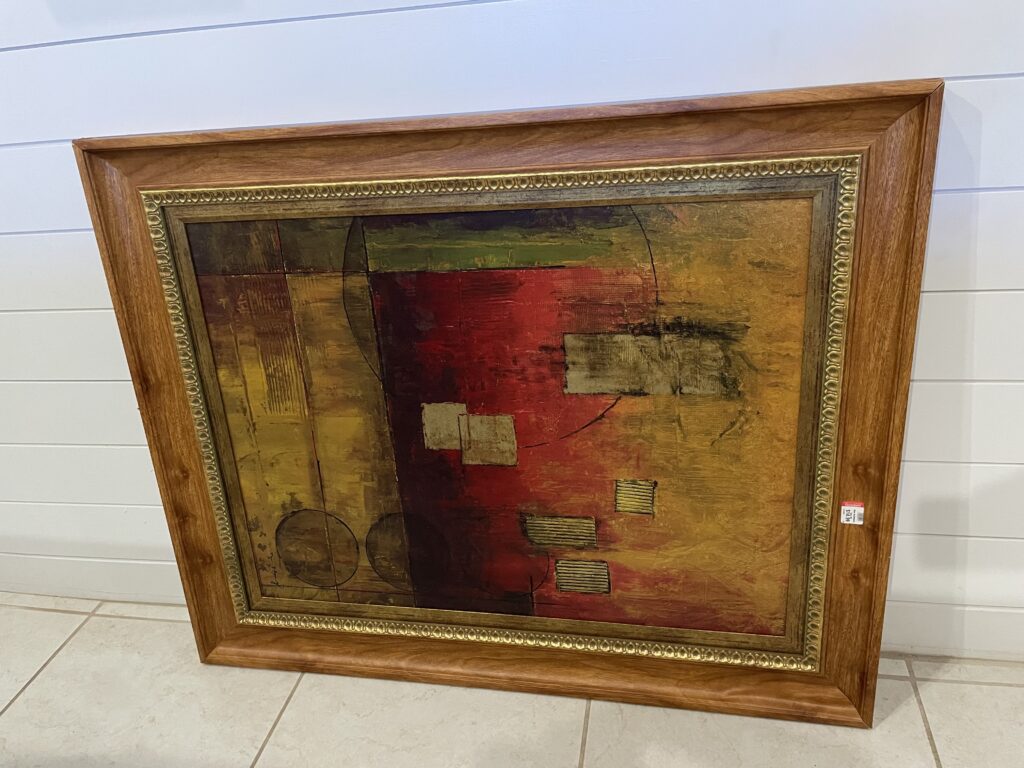
I found a great piece for $14.99! Great size and I liked the frame. That gold trim accent was just perfect. Time to transform and makeover this piece into a winter wonderland.
Supplies Needed
- Goodwill/Thrift store framed art
- Spackle
- Painting knife or spatula
- Putty knife
- Acrylic Paint
- Paintbrush
Prep and placement
First things first. Clean and prep the framed art. Using a microfiber duster get all the debris and gunk off. I placed the framed art on the table to help my back but this can easily be done on the floor or hung on the wall.
Video tutorial
I shared this DIY earlier in the week on Instagram. Here is the tutorial of what my daughter and I did.
The spackle is the major player in this DIY project. It goes on pink and dries white so it’s easy to put on and more importantly, you will know when it’s dry so you can get to the next part. It is sold in a variety of sizes. A tub will last you a while and can be used to patch up holes in walls. Just make sure you properly close the tub. I left it slightly open on one side and it dried the spackle. It should be difficult to open the tub and with good reason.
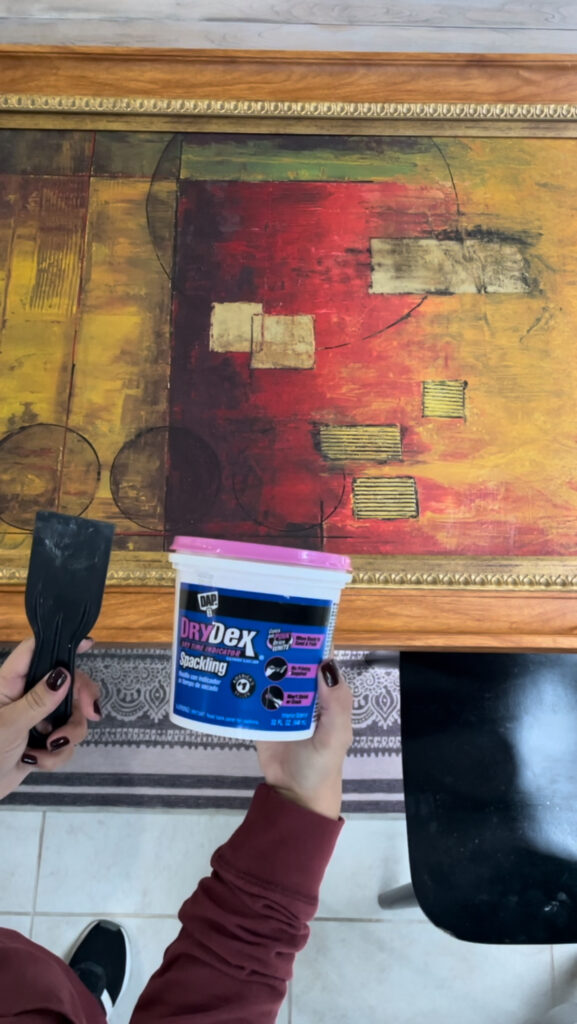
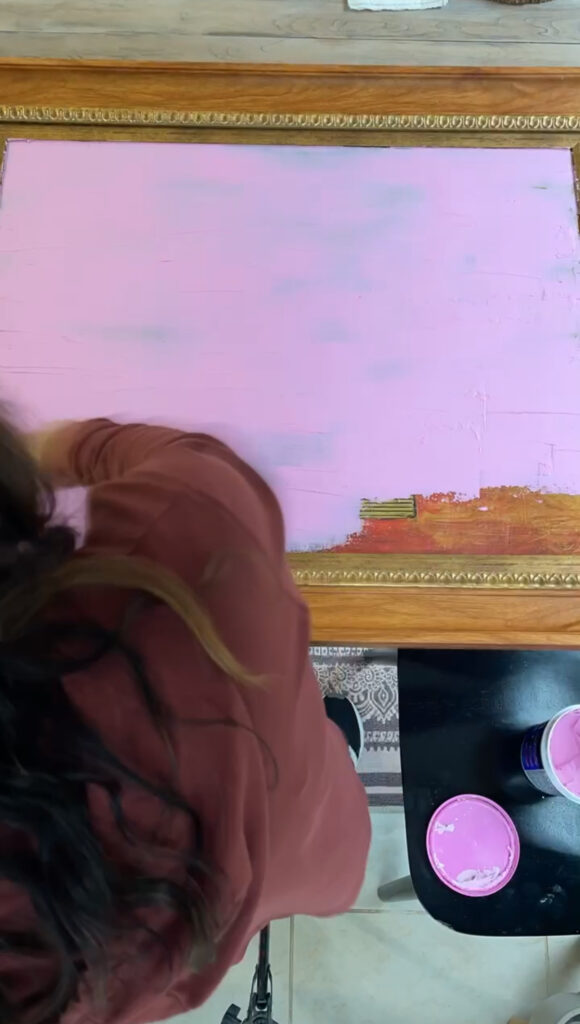
Start by covering the entire piece with a light coat of spackle. I started at the top left worked my way across and then down. It doesn’t have to be seamless a little texture on this part will give the background some dimension.
This next part is the fun part. I used my putty knife and added a vertical amount of spackle. It should be the height of the tree you want. Adding more spackle as you get further to the bottom or trunk of the soon-to-be tree. I have never used a tiny paint knife or spatula before. First time for everything.
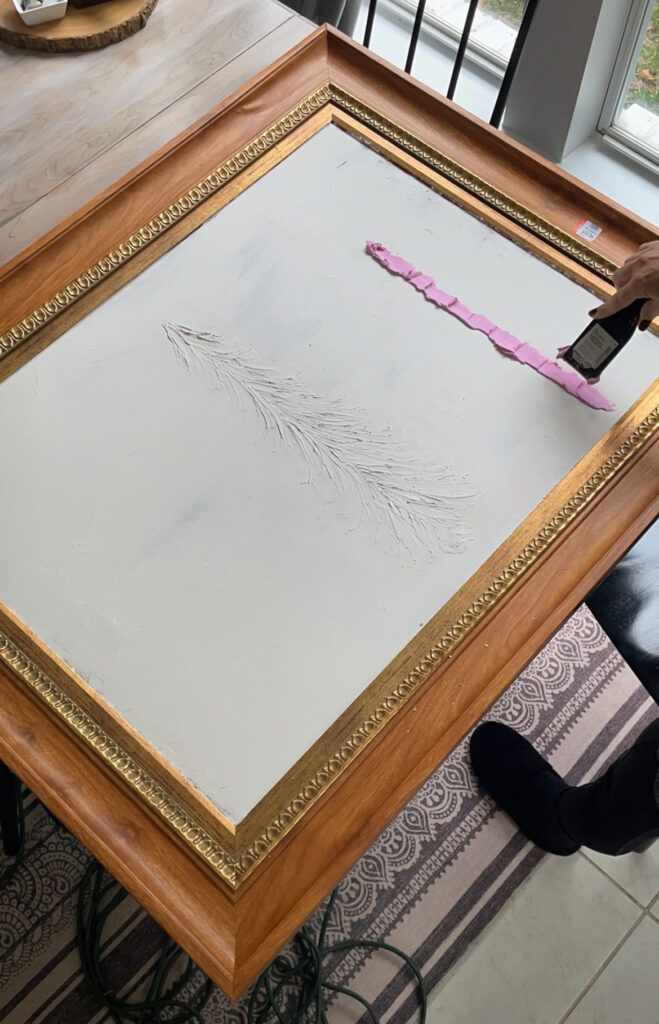
There are a lot of different painting knife shapes and sizes. The one I used looked like an elongated diamond with a rounded tip. Use the one you believe looks more like a tree branch. I only used one knife. I started at the top of the soon-to-be tree and fanned the spackle out and slightly down to mimic a tree branch. Get creative and trust the process. Keep going and adding spackle until you have the size and shape you want. Once you are happy fanning all the branches out let the tree dry. It turns white when dry.
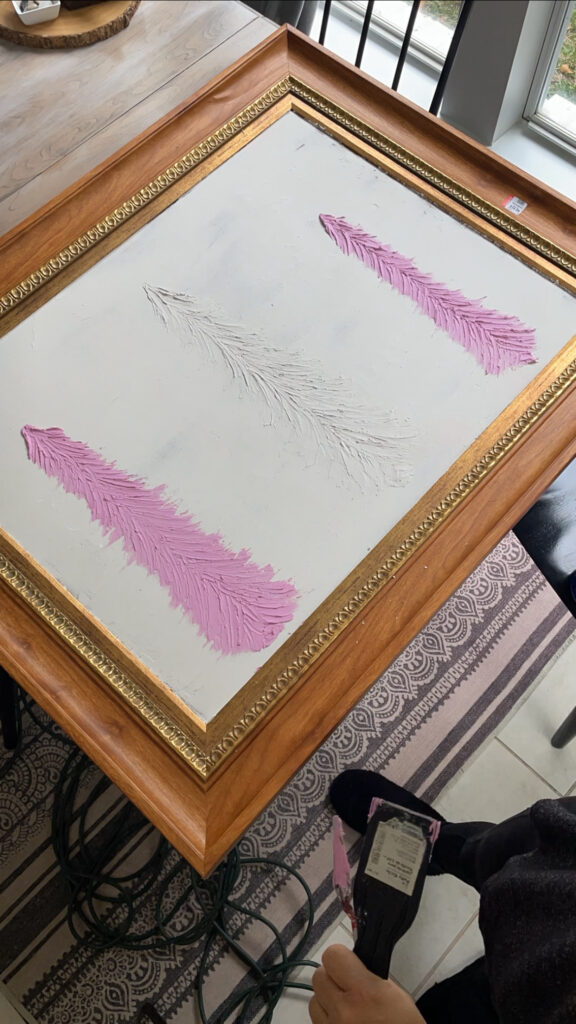
creating a Winter Aesthetic
Create a harmonious color scheme that captures the winter aesthetic. My daughter is an art student and wanted to paint the DIY textured winter art. With more experience in art, I gladly handed her the paintbrush.
Landscape hues that match your aesthetic
She used the color scheme we have in the house as inspiration. She used only brown, black, and white on her palette. I should have recorded a time-lapse of her in action. Maybe on the next one. She added the brown to the trunk and branches and fanned out. Less is more in this case. My favorite part of the landscape is the background. She did a wonderful job creating an ombre winter night. Starting on the corners with the black she gradually added more white to her palette and blended until she reached the bottom where it was mostly white like the snow.
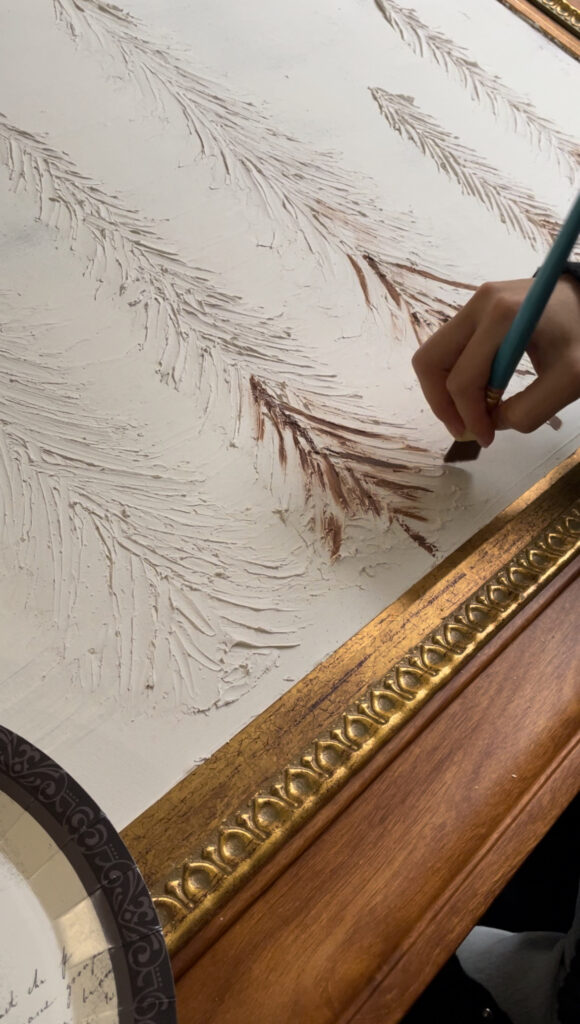
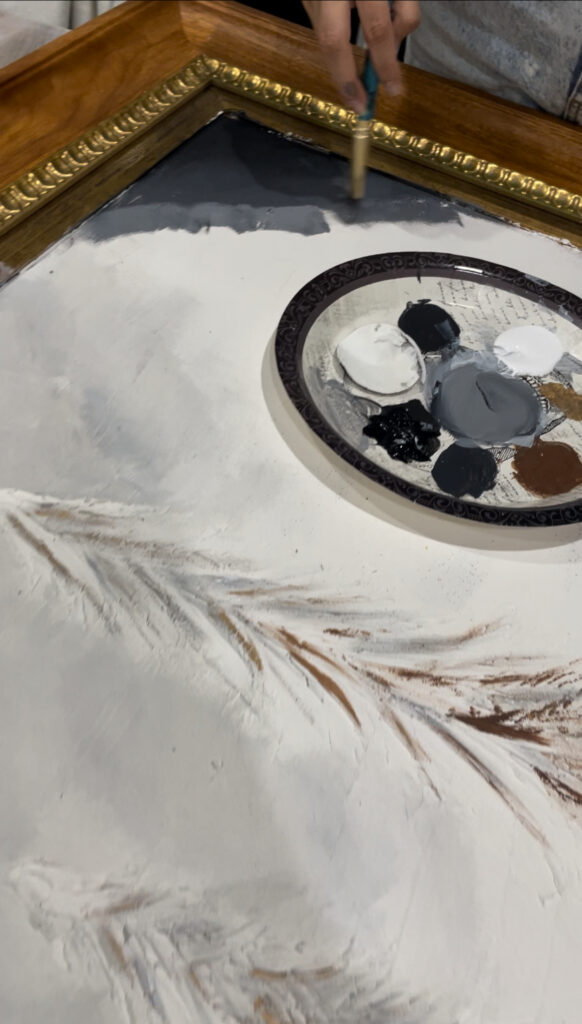
Textured borders
The raised texture helps create lines to draw in and almost acts as a border for the paintbrush. A dark-gray would look wonderful if you don’t want to experiment with the ombre night sky. This next step was not documented. and really should have been because it was fun to do. Using the other end of the paintbrush dab it in the white and add the snow. Scatter it around it and dab it a few times before you add more paint.
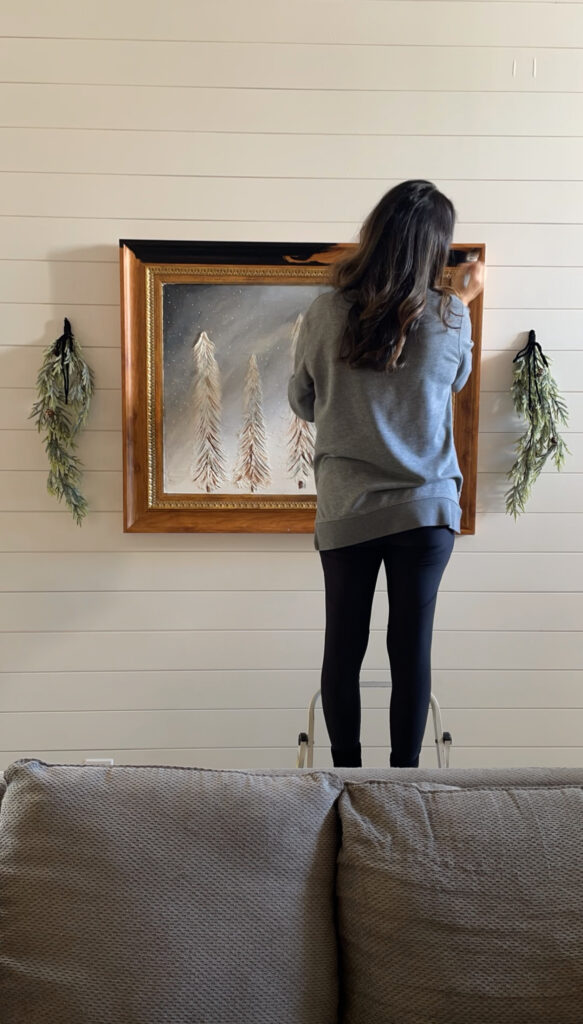
Painting the wood black made this piece pop. The gold stands out against the black frame. After it was hung up I added a couple of swags tied with black velvet ribbon. Those swags were a garland I cut up because I wasn’t using it. I plan to add some smaller vintage bells but haven’t found any yet.
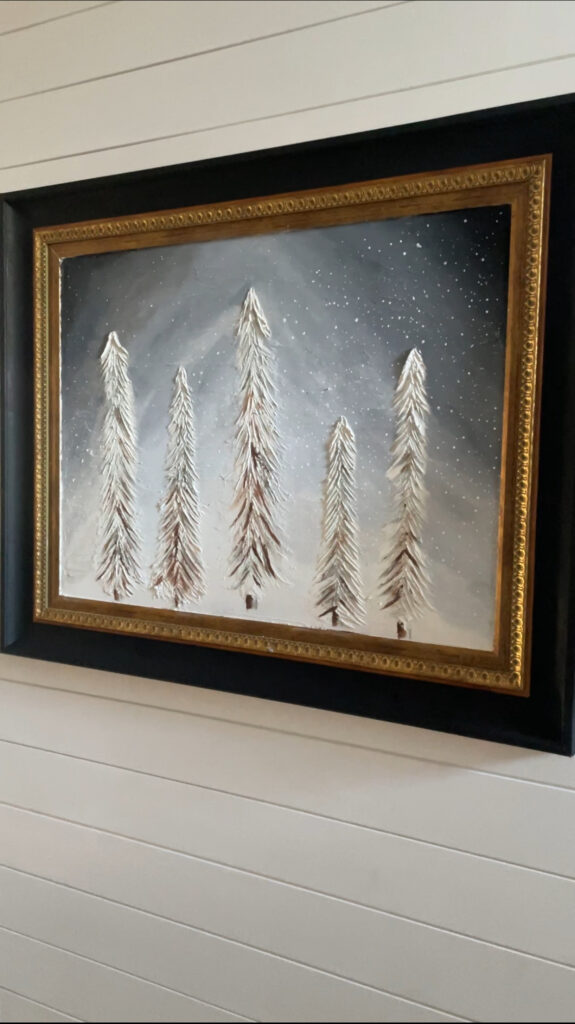
Here it is! Our DIY Textured winter art. This came out so much better than I expected. Overall it cost me about $25 in all. I love that this piece will stay up well past Christmas. It is neutral but looks so festive for Christmas. Decor after Christmas is always tricky. Here is a post with more after-Christmas inspiration. Let me know below what you think and if my daughter and I should make more. She is headed to college soon. #collegefund 😂


[…] you get the most value for your money without compromising on style. Pairing these pieces with DIY art is another way to save some money filling up walls and empty spaces. If DIY is not your thing these […]